How To Create Your Canva Website Navigation Menu?

How To Create Your Canva Website Navigation Menu?

Back when I started creating my very first Canva website and web templates I got a little confused on how to build a top navigation. So I wanted to share with you guys on ways that I learned on how you can add a navigation menu in your Canva websites – what are the options and what you can’t do as of this time. 

There are still limitations today though on what you can do to navigation menus on Canva websites. However the options that we have is more than enough to give your visitors a good experience and a functioning website for your business or profession. 

How To Create Your Canva Website Navigation Menu?

How To Enable Canva Website Built-In Navigation

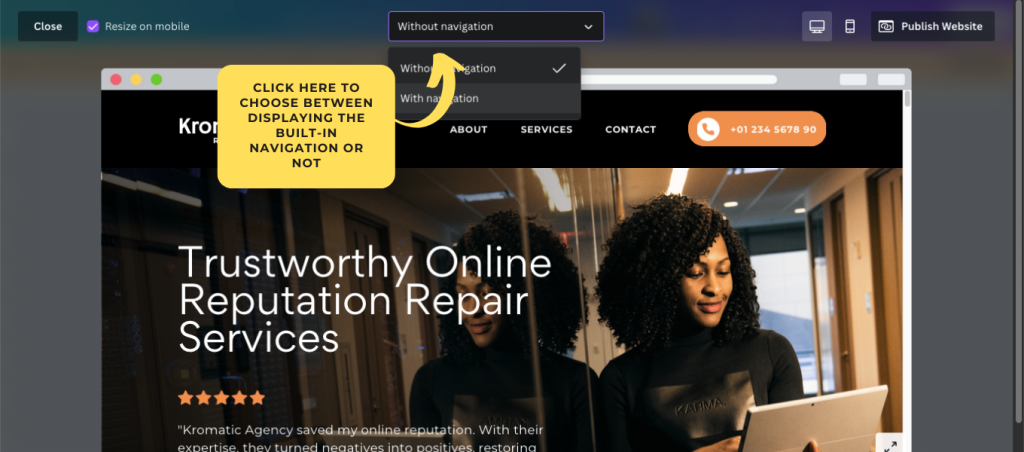
First option, and the easiest one, on how to create your top navigation menu in your Canva website is enabling the “With Navigation” option when Previewing and/or Publishing your website. This will easily give you a built-in top navigation in your page. When enabled, your Canva website will have something at the top that looks something like the image below:

How To Create Your Canva Website Navigation Menu?

Let me give you this example with a Live Demo from one of my templates so that you can experience how it works: https://kromaticdesignstudio.my.canva.site/credit-repair 

To enable the Canva Website built-in navigation, there are two ways:

Option 1: While editing your Canva website, click on the “Preview” button somewhere at the top, then at the dropdown at the top choose “With navigation”. 

How To Create Your Canva Website Navigation Menu?

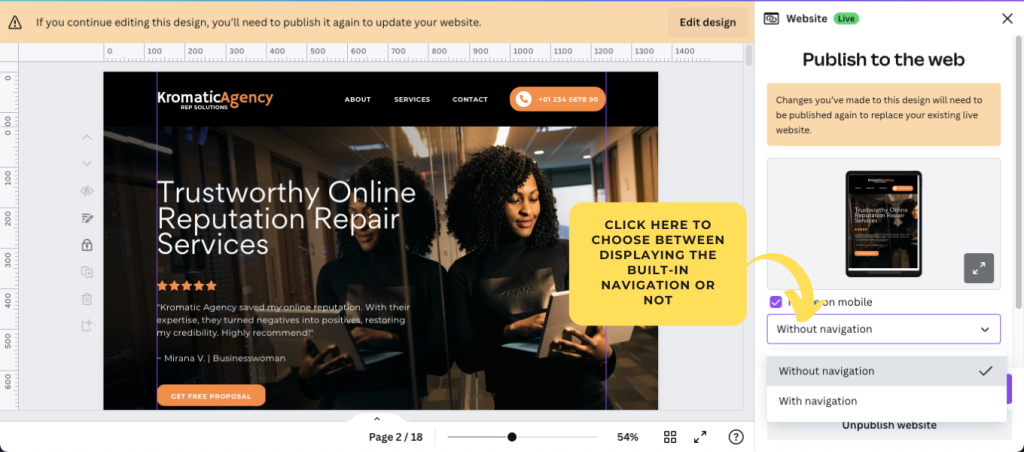
Option 2: Just at the right of the “Preview” button, click on the “Publish Website” button, locate the dropdown below then choose “With navigation” before clicking continue.

How To Create Your Canva Website Navigation Menu?

Important – Canva Website built-in navigation has its limits!

  1. You can’t customize how the navigation looks like: Once enabled, the top menu will look exactly like the one in the image above – you can’t change the color of the navigation bar, you can’t change the font of the text links, or sort/re-arrange them to your liking, etc.
  1. The links are only on-page anchor links: Which means the links are populated from each page/section title you have “on page”  – for example if you added a new page or section then you name the page “TESTIMONIALS”, then that section will be added to your navigation menu with the same text to the link. Once you click the link in the navigation, it will automatically scroll into that page/section with the name “TESTIMONIALS” (In the live demo link I provided above – you will notice “#testimonials” is appended in your url bar – the same goes for the other links).
  1. The top navigation location is fixed: You can’t fix the navigation bar at the top of the page, it will always be visible and floating as you scroll down the page. 

If you want to have your own custom links – like linking on a different website url – you need to have this option disabled and just create your own link (which I will discuss next).

How To Create Your Own Top Header Navigation Menu

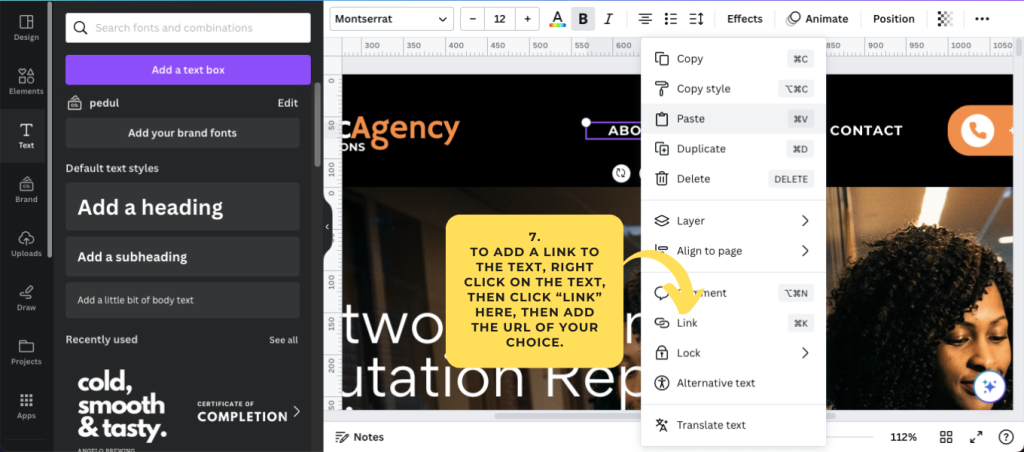
If you want more freedom and flexibility on how you want the top navigation will look like and what links you want to put into. Then creating your own is our next option.

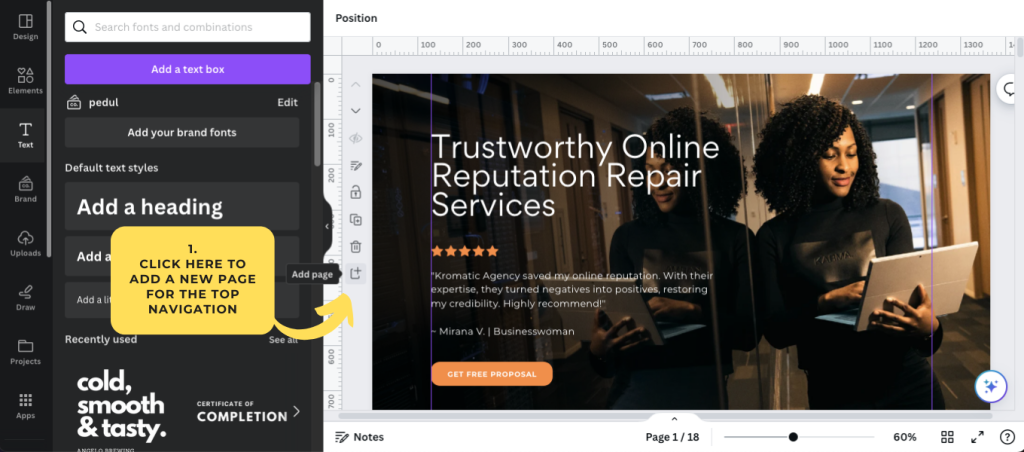
First of all, if we are creating our own top navigation, we need to disable built-in navigation. To do this we just need to follow the options and steps above (on how to enable navigation) and just choose the other option – “Without Navigation”.

In creating our top navigation bar, you will have the freedom on how it looks like and where the links would go to – weather an anchor on-page link, a link to another page, external links, links to open or download a file, a link to an opt-in page, link to call or email you, literally anything of what a link can point to.

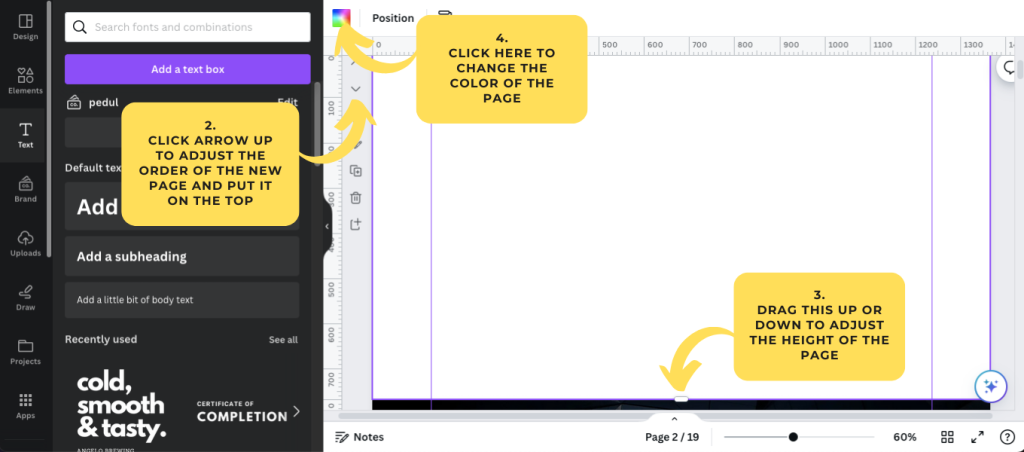
In our example below I created a simple top navigation in black background, with a sample logo on the left, and a few links to the right. Here is how I created the top navigation:

Add a New Blank Page

How To Create Your Canva Website Navigation Menu?
  1. At the left side of each page, there are small icons – click on the “add page” button. It will automatically add a new blank page at the bottom of the current page that you have.
  2. Click on the arrows to adjust the order of the pages – in this case we place the newly created page at the top.
  3. Adjust the height of the section by clicking at the bottom of the section and dragging up or down. We’re creating a top navigation so it should be small but enough to fit our links.
  4. Click on the box with rainbow colors at the top to change the color of the navigation menu. In this case I chose black.
How To Create Your Canva Website Navigation Menu?

Adding Contents to Your Navigation Menu

  1. Add your logo on the right side of the navigation menu. In this case I only added a couple of texts as my logo but you can upload your own logo image and drag it here. You can also add a link to your logo if you prefer.
  2. Add a new text for each link that you have. In this case I created three texts – “About”, “Services” and “Contact”. I also created a phone number button at the very right position to make it immediately visible to potential clients who want to contact you via phone if you have. It can be anything you want and put a link to it where they can email you, or call you, or link to another page, etc.
How To Create Your Canva Website Navigation Menu?

Adding Links to the Texts

  1. To add links to your navigation, right-click on the text, then click on “Link”. Input the URL in the textbox to point that text to that location. Do the same to all texts you have.
  2. Don’t forget to test your links!
How To Create Your Canva Website Navigation Menu?

What’s good is you can use any element (not just texts) and put a link into it – it can be an image, graphics, animated graphics, icons, video, anything!

So there you have it – you created your own custom navigation menu on your Canva website. To see the custom navigation you can check this live demo on one of our templates: https://kromaticdesignstudio.my.canva.site/online-reputation-repair

Canva Website Link Limitations

It’s also important to mention what we can’t do, as of this moment, to our links in Canva websites. Here are some of the limitations I encountered, but hopefully in the future Canva will be able to address this to make their websites more functional and interactive.

  1. Multi-level menus or dropdowns: As of today, we can’t do popup dropdown sub menus on-click or on-hover to the links we create.
  2. Interactive elements like mouse over, mouse click or hover and other animations are currently not available this time.
  3. Opening in a new browser window or tab: It should be a good option if we can choose to have the link open a new browser window or tab on click, but no option as of this time.
  4. Other Link options: Like setting a dofollow or nofollow options, rel, etc. is currently not available. You just have to enter the url of the link and that’s it.

Additional Things To Consider

Crafting a navigation menu isn’t just about slapping a few buttons and texts together; it’s about creating a seamless user experience that leaves visitors coming back for more. Here are a few key things to keep in mind as you put the finishing touches on your masterpiece:

  1. Clarity is Key: Keep it crystal clear. Your navigation menu should be intuitive and easy to understand. Avoid fancy jargon or cryptic labels that leave users scratching their heads. Instead, opt for simple, descriptive terms that leave no room for confusion.
  2. Keep it Simple: Less is more. A cluttered menu overwhelms users and detracts from the overall user experience. Stick to the essentials!.
  3. Always Test your navigation links before publishing: Don’t hit the Publish button just yet. Before making your page public, take the time to thoroughly test them if it works and points to their intended urls. Look out for any usability issues or glitches that could hinder the user experience.

Conclusion

And there you have it! Now you should know what we can do with our Canva website navigation and what we can’t do (at least for now). Hopefully a time will come that we can actually overcome the limits on what we can do to our navigation links in Canva.

I hope I have helped you in some way on how to create your navigation menu if you are using Canva websites. Let me know if I may have missed something or what is not clear to you – just drop it in the comments! Happy web designing!

Post a Comment

Related Items

history of landing pages
Landing Page History of Landing Pages
admin 03 Jan, 2024
web design inspiration for arts websites
Web Design Inspiration Web Design Inspiration: 10 Eye-Catching Arts Website Designs
admin 26 Feb, 2024

Shop All Web Templates!

Where Creativity Meets Simplicity - Customize with Ease! Forget about Coding and Enjoy Designing Your Website.